If you want to record your screen on Windows, start with the built-in tools before installing another recorder. On Windows 11, Snipping Tool can record a selected area of the screen. Xbox Game Bar can record many apps and games. Clipchamp is useful when you want to trim or edit the recording afterward.
This guide explains the easiest Windows screen recording methods, how audio works, where recordings are saved, and what to check when recording does not start.
Table of Contents
- Windows Screen Recording Options
- Record with Snipping Tool
- Record Apps and Games with Xbox Game Bar
- Where Windows Saves Recordings
- Edit Recordings with Clipchamp
- What to Check When Recording Does Not Work
- FAQ
- Summary
Windows Screen Recording Options
Windows screen recording is easier when you choose the tool by purpose.
| Tool | Best For | Audio | Save Location |
|---|---|---|---|
| Snipping Tool | Recording a selected area or short workflow | Microphone and system audio options may appear depending on version | You choose where to save |
| Xbox Game Bar | Recording an app window or game | Microphone and app audio | Videos > Captures |
| Clipchamp | Editing and exporting a recording | Adjust during editing | You choose during export |
For most Windows 11 users, Snipping Tool is the simplest place to start. For games or app windows, Xbox Game Bar is faster. If you want to remove mistakes or add text after recording, use Clipchamp after the capture.
Record with Snipping Tool
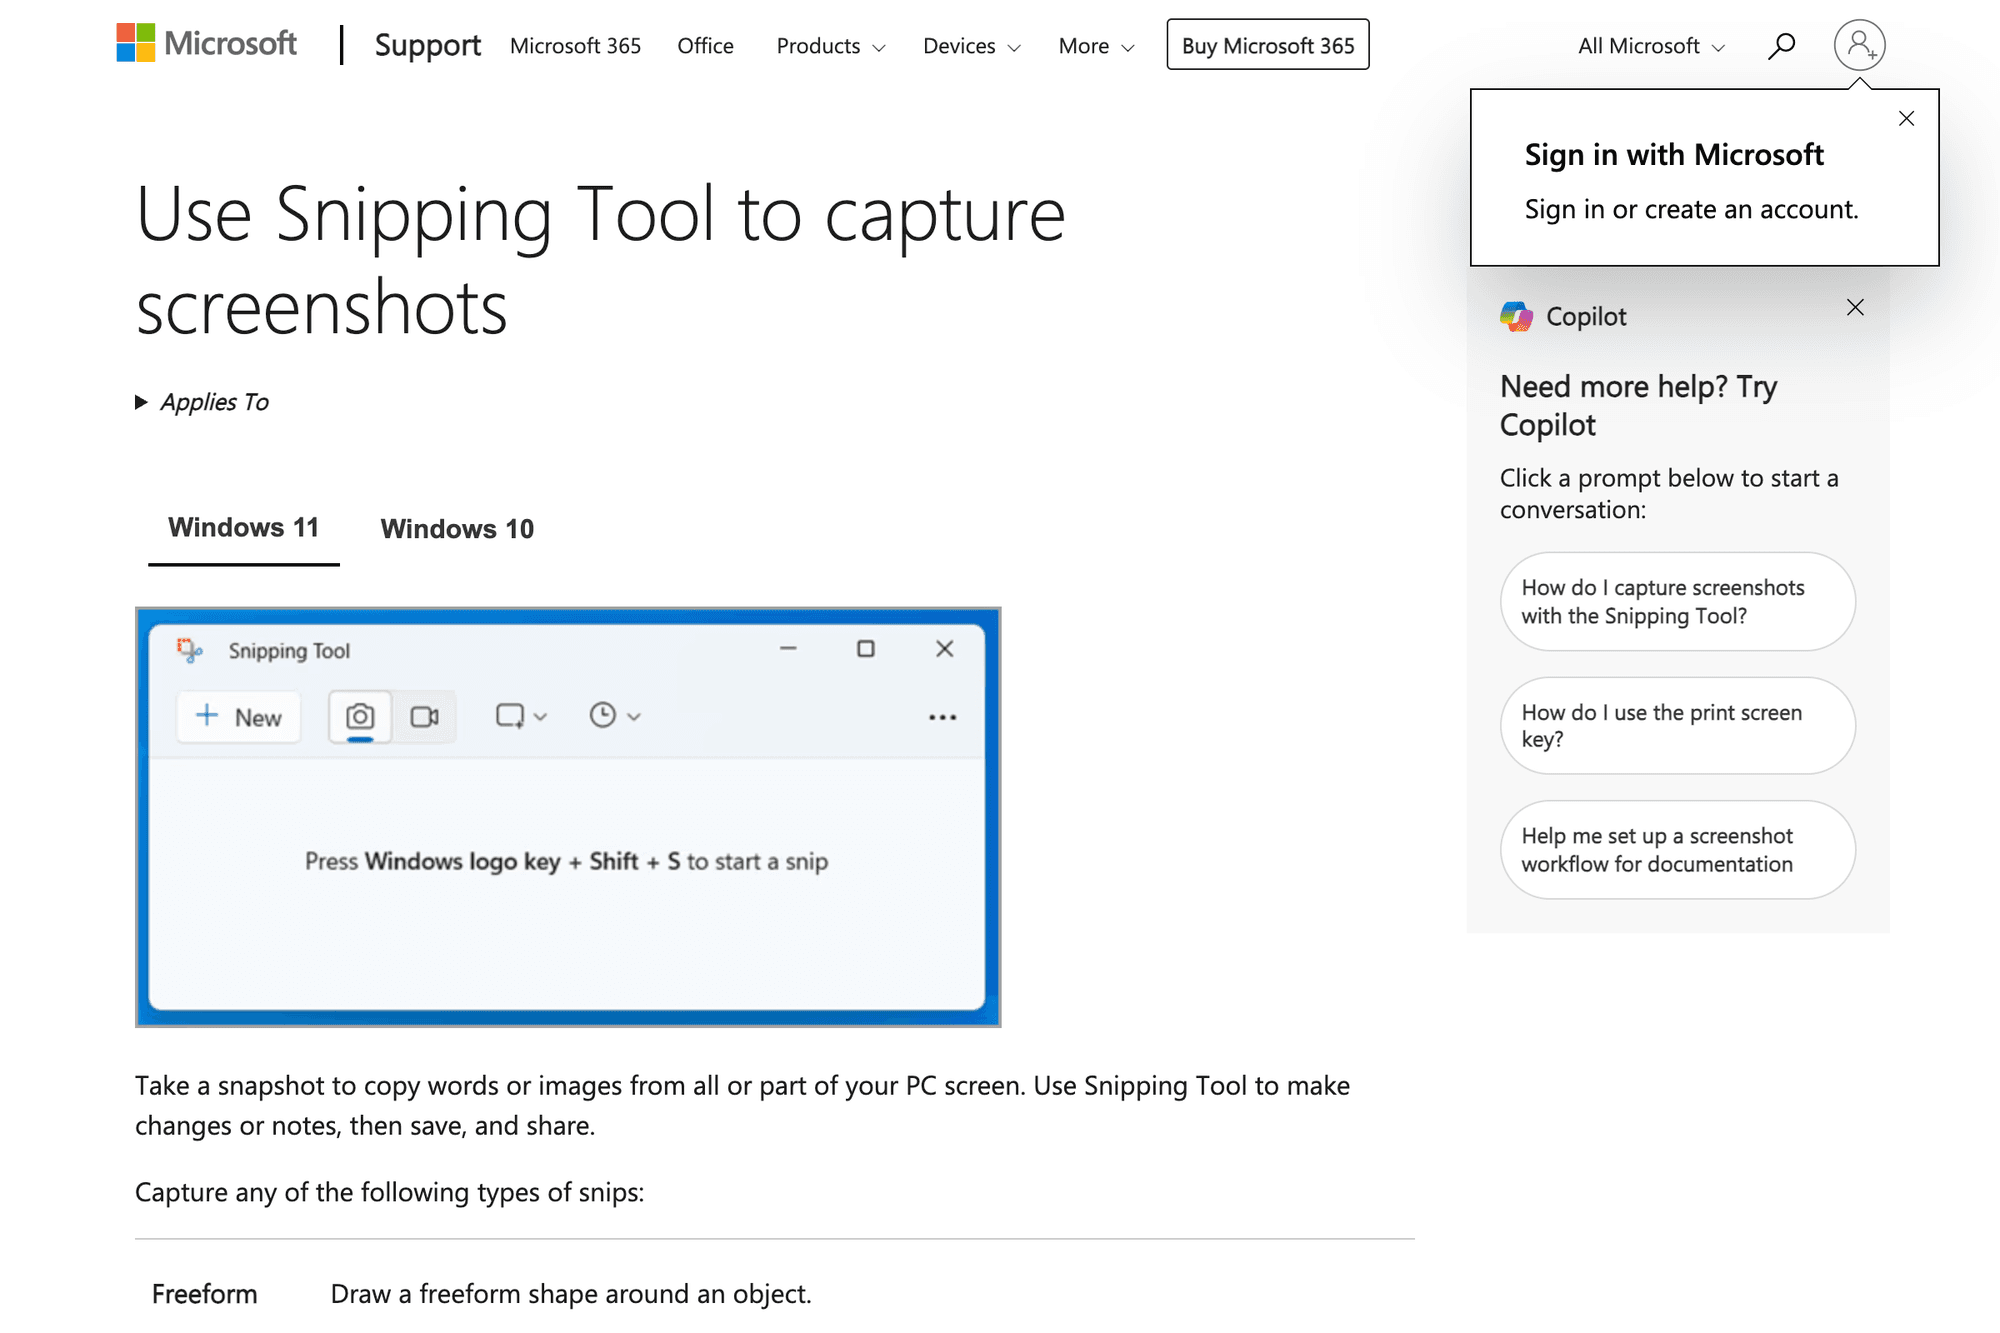
Snipping Tool is the built-in screenshot and screen recording tool on Windows 11. It is useful when you want to record a selected area instead of a full app window.
Basic steps:
- Open Start and search for Snipping Tool
- Select the video recording mode
- Choose New
- Drag to select the area you want to record
- Start recording
- Stop, preview, and save the video
On some Windows 11 versions, Windows logo key + Shift + R can start the recording flow. Audio options depend on your Windows and Snipping Tool versions, so update Windows and Snipping Tool from Microsoft Store if the recording controls look different.
Record Apps and Games with Xbox Game Bar
Xbox Game Bar is built into Windows and is designed for recording games and app windows. Despite the Xbox name, it is not only for Xbox users.
Basic steps:
- Open the app or game you want to record
- Press Windows logo key + G
- Open the Capture widget
- Select the record button
- Stop recording when finished
The shortcut Windows logo key + Alt + R can start or stop recording quickly. If you want microphone audio, check the capture settings and make sure microphone access is allowed.
Xbox Game Bar is not the best option for recording the desktop, File Explorer, or a freely selected screen area. Use Snipping Tool for that.
Where Windows Saves Recordings
Xbox Game Bar usually saves recordings here:
C:\Users\YourName\Videos\Captures
You can also open the Videos folder and look for the Captures folder.
Snipping Tool asks you to save the recording after you stop. Choose a folder that is easy to find, such as Videos, Desktop, or a project folder.
Screen recordings can become large quickly. Before a long recording, check available storage. If the file is too large, trim unnecessary parts in an editor before sharing.
Edit Recordings with Clipchamp

Clipchamp is Microsoft's video editor. After recording with Snipping Tool or Xbox Game Bar, you can import the video into Clipchamp to trim mistakes, add text, adjust audio, and export a cleaner file.
For tutorials, training videos, and YouTube clips, editing matters. Removing pauses and repeated steps usually makes the video easier to understand than sharing the raw recording.
What to Check When Recording Does Not Work
If Windows screen recording does not work, check these points first.
- Update Windows
- Update Snipping Tool from Microsoft Store
- Restart the app you want to record
- Check microphone permissions if you need voice
- Confirm that the save drive has enough free space
- Try Snipping Tool if Xbox Game Bar cannot record the target screen
- Do not expect protected streaming video to record correctly
Some streaming services and protected video players may show a black screen in recordings. That is usually caused by content protection, and changing recorders may not solve it.
If your PC is also due for a system update, check the Windows 11 upgrade guide before changing screen recording tools.
FAQ
Can Windows 10 record the screen?
Yes. Xbox Game Bar can record many apps and games on Windows 10. Snipping Tool screen recording is mainly a Windows 11 feature.
Can I record the entire desktop?
Snipping Tool can record a selected area. Xbox Game Bar is better for app and game windows, not the full desktop or File Explorer.
Can Windows record audio too?
Yes, depending on the tool and version. Xbox Game Bar can record microphone and app audio when configured correctly. Snipping Tool audio options depend on your Windows and app version.
Summary
For Windows screen recording, start with the built-in tools. Use Snipping Tool when you want to select a screen area. Use Xbox Game Bar for games and app windows. Use Clipchamp when you need to trim, add text, or export a cleaner video.
If recording fails, update Windows, update the tool, check microphone permissions, and confirm that the target screen is not protected by streaming or DRM restrictions.